How To Deploy Django Application in Apache server with cPanel and Phusion Passenger
Django is a popular web framework built in Python. And with Django, you can build dynamic websites and web applications. We all are pretty familiar with developing the sites with Python and Django, but it might be difficult in deploying it on a live web server, especially cPanel. Many developers prefer deploying sites either with Virtual Private Server (VPS) or using the Nginx web server. But in this tutorial, we will guide you on how to deploy Django application in Apache server with cPanel and Phusion Passenger.
Our Server Setup for deploying Django Application with cPanel and Phusion Passenger
- Python (Any version)
- Phusion Passenger
- CentOS
- Apache server
- Mysql DB
- cPanel
Now, Let’s begin the steps, you need to follow in order to deploy the Django application in the live web server.
Check our Python Hosting Packages: Python Hosting Packages, Django & Flask
How To Deploy Django Application in Apache server with cPanel and Phusion Passenger
Step 1: First, if you plan to host your Django website with cPanel, then your hosting provider must have access you the cPanel for your corresponding domain.
Step 2: In order to open up the cPanel, go to the URL www.<YourDomainName>.com/cPanel
Step 3: Login with your cPanel username and password, if you are unknown about it, ask your hosting provider. They will provide you.
Step 4: Now, if you successfully login to the cPanel, go to the Software section, search for the setup Python App and Click on it.
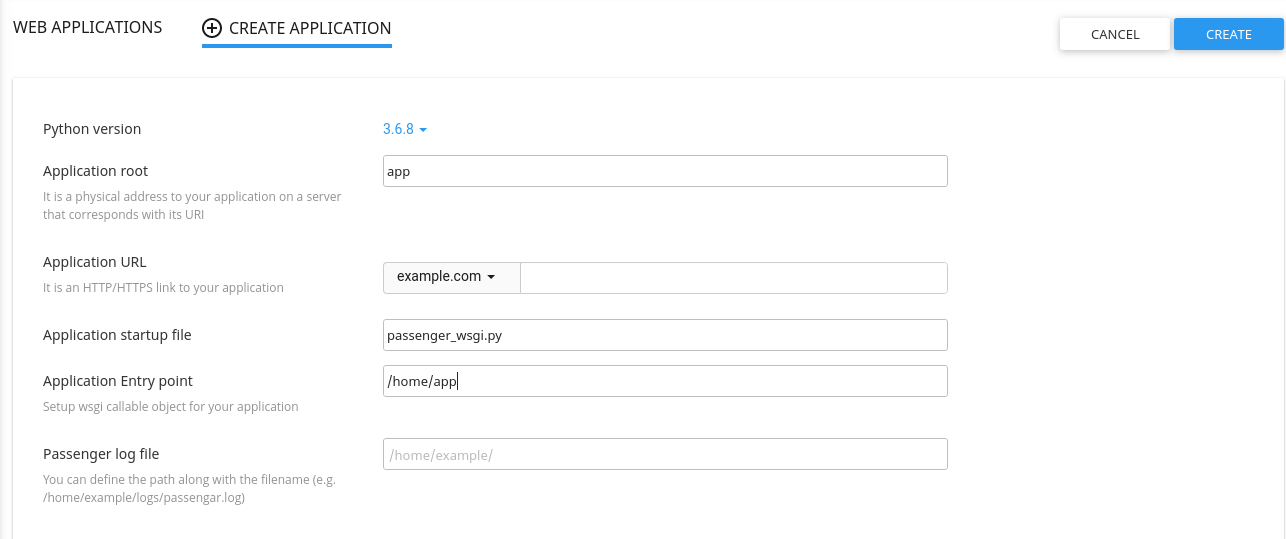
Step 5: You will get the new Python Application setup page and click on Create Application tab. And fill the corresponding fields according to your Django application requirements. such as the Python version, in which you build your application. In our case, it is Python 3.6.8. Other fields, keep as the screenshot below for now.
Note: Make sure, in your server Phusion Passenger is installed.
Step 6: After creating the app, now go to your cPanel Terminal from the cPanel homepage.

Step 7: In Step 5, we successfully created the Python application. After the successful creation of the python app, you might have noticed a message something like the below screenshot.

It is the message, to enter into the Virtual Environment. copy the command. as
source /home/example/virtualenv/app/3.6/bin/activate && cd /home/example/app
paste this in the cPanel terminal you recently opened with CTRL+SHIFT+V.
Step 8: After entering into the virtual environment. Now, we need to set up the Django application. For this first, you need to install Django. To install Django type in the command, pip install django.

Step 9: Now, you need to upload your project main directory files into the recently created python application.
such as: In this example, we create the app as the python application. Inside the app, we copy all of our files and folders of your project directory inside the app folder. Now, your recently created python app should look like.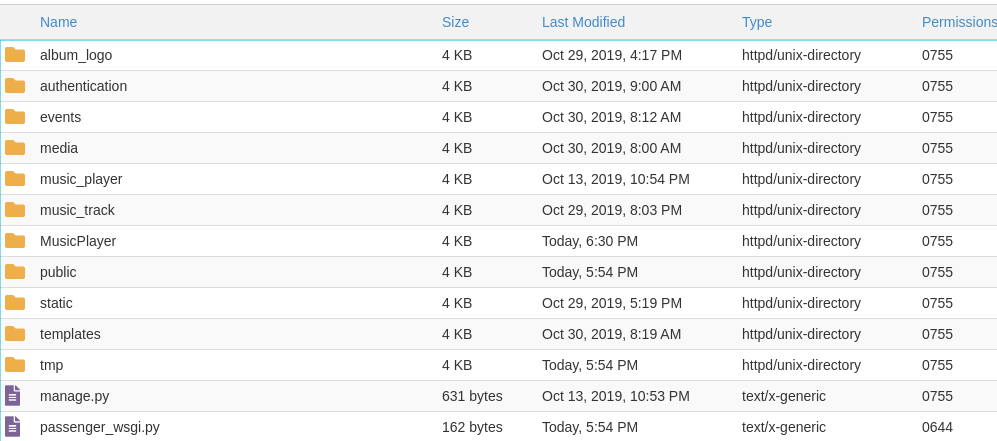
Step 10: Now, let’s edit out Database configuration, Static and Media settings. For this go to your project’s main app’s settings.py.
In the above example, our main app is MusicPlayer, inside this, we will find the settings.py now let’s edit this file.
in your settings.py, replace your STATIC_ROOT, MEDIA_ROOT, and STATICFILE_DIRS.
STATICFILES_DIRS = [ BASE_DIR+”/assets”, ]
STATIC_ROOT = ‘/home/example/public_html/static’
MEDIA_ROOT = ‘/home/example/public_html/media’Also, adit ALLOWED_HOSTS = [“example.com”, “www.example.com”]
Edit the Database Configuration. Before you migrate all your models, you must have created the Mysql Database.
DATABASES = {
‘default’: {
‘ENGINE’: ‘django.db.backends.mysql’,
‘NAME’: ‘example_test’,
‘USER’: ‘example_example’,
‘PASSWORD’: ‘Bloodfind123!@#’,
‘HOST’: ‘localhost’,
}
}
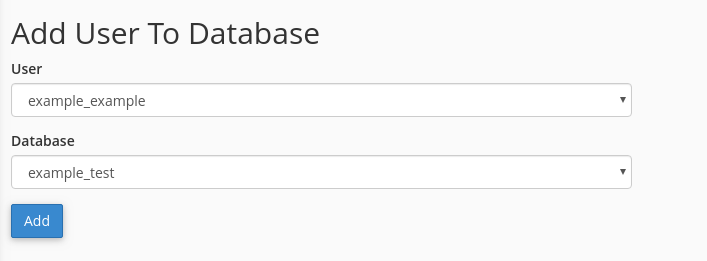
In cPanel Homepage, search for the option MySQL Database and create the new_database and add the user to alter the Database.

Step 11: After creating and configuring the Database, it’s time to migrate all the models to our Mysql Database.
So, In the cPanel Terminal, first, install mysqlclient. You can install it by pip install mysqlclient
Now, type the command python manage.py migrate
Step 12: Now to run the static file, first you need to create the folder called assets inside our app.
Step 13: Now in the terminal type the command, python manage.py collectstatic
Step 14: Still it won’t work, and you will see the error something of Phusion Passenger. Now let’s edit our passenger_wsgi.py.
Step 15: This file is created, while you set up the Python application. So, open your passenger_wsgi.py and write the one line import code.
from MusicPlayer.wsgi import application #this is just we import application from the wsgi.py
Step 16: That’s it, now please restart your python application and see the Magic, it will successfully work.
This much, after all this you must see your website live in Apache server.
I hope this article on How To Deploy Django Application in Apache server with cPanel and Phusion Passenger is much helpful and practicable for you.